I wanted to make a thunderbird Christmas ornament, but when I started thinking about the process, the approach seemed very complicated. I did some googling and found that there ”were much simpler ways of making the pattern.” This post will describe how I made my thunderbird pattern.
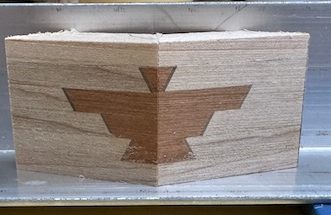
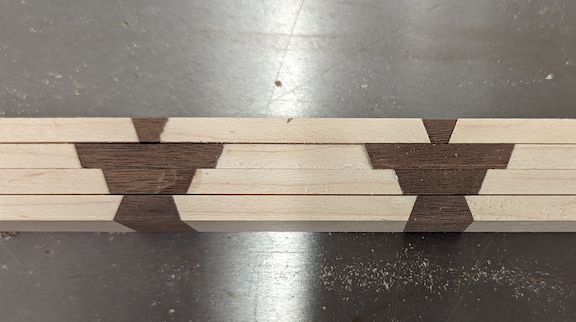
You can use this pattern in any turning, but you must be careful with the math. For one of my first attempts, I made a unique thunderbird that had a “floating head” on accident. Figure 1 is how the finished product should look. Figure 2 shows the bird with the mistake.
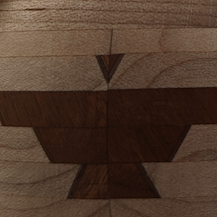
When I made the segment, I cut it down the middle. If you cut it down the middle, the pattern will get smaller the deeper you turn into it. At some point, the head floats above the bird’s body. After this accident, I realized I should make the segment as a single unit and cut the segment angles on the edges of the unit. Since the pattern was consistent all the way through the segment, the “floating head” problem went away
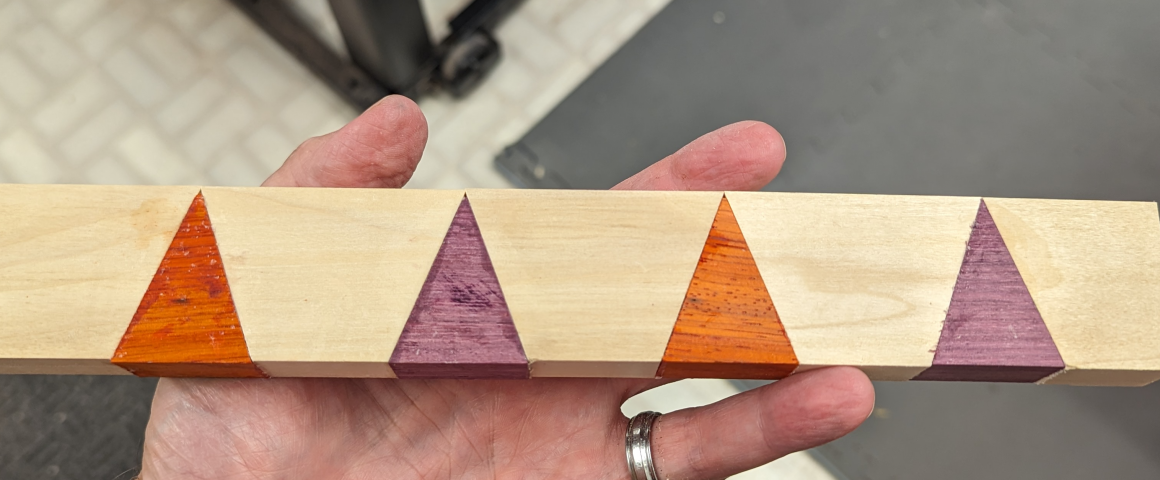
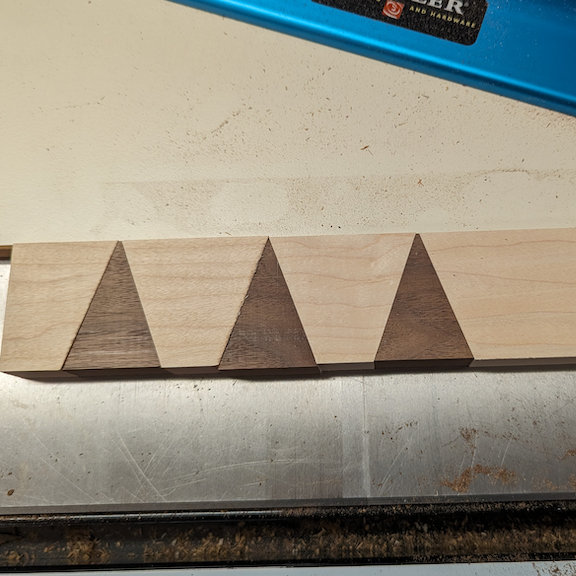
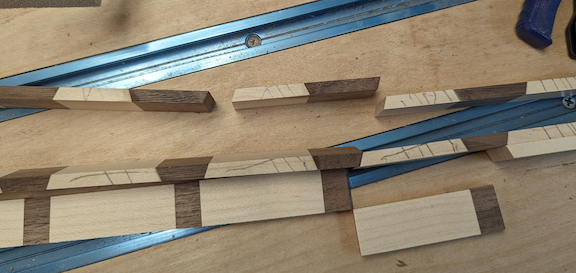
The approach that I used to make the thunderbird pattern started with cutting triangles. In the example in Figure 3, I cut triangles from padauk and purpleheart. The triangles become the thunderbird at the end of the process. To make the strip shown, I cut maple at the same angle as the triangles and then glued them together. The goal with this glue-up was to have alternating color thunderbirds. The purpleheart worked well, but because of the oiliness of the padauk, it didn’t give me the look I was hoping for. When I attempted to apply the finish, the orange color of the padauk smeared onto the maple.
The thing that I struggled with the most was determining the angle to cut the triangles. I was fitting the thunderbird into a small Christmas ornament and needed it to be the right size. After some guessing and a few failures, I created a spreadsheet that would do the math for me.
The first step in making the thunderbird is to determine the finished size you’ll need for your feature ring. In this post, I will use the dimensions to fit into a bowl that I am making. The first thing I did was to design the bowl. In my design, the wingspan of the thunderbird would be 1 1/4 inches. I have created a spreadsheet that helps determine the angle of the triangles and the size of the strip of wood. You can download the spreadsheet for the Thunderbird Angle Calculations here. The spreadsheet contains multiple fields highlighted in yellow. The yellow fields are the only fields that will need to be updated. (These fields are circled in Figure 4.)
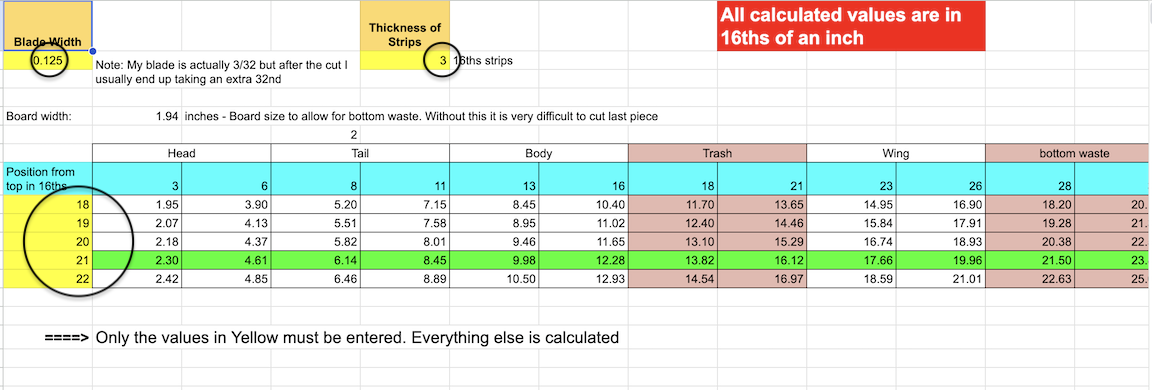
The fields that need to be changed are the Blade width, the thickness of each strip in the thunderbird, and the angles. Note: My blade width is 3/32, but when I finished the cut it ended up being closer to 4/32. For my bowl, the thickness of the strips will be 3/16″. Then, I started guessing at angles. I started at 18 ° and ended at 22°. When I looked at the long side of the wing field, I saw that 21° gave me almost 1 1/4″. You will observe that the spreadsheet computes the board width field for you as well. Since this pattern is just under 2″, I used a 2″ height for my triangles.
Once the math was done, I prepped my wood. The strips of walnut and maple that I needed were 2″ by 3/4″. In my scenario, I was prepping for a bowl, so I needed three strips of maple and one strip of walnut. In the end, I made 18 thunderbirds.
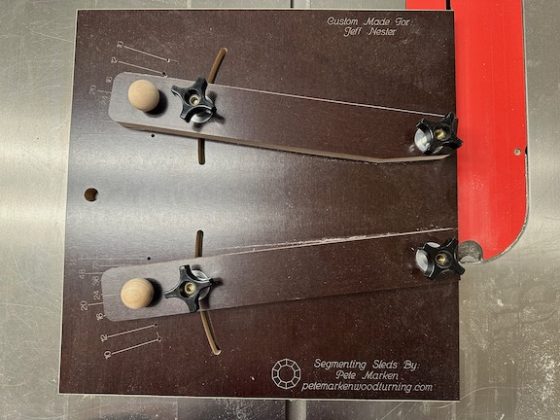
After I had prepped the wood, I set up my cut-off sled, set the angle to 21°, and cut the walnut triangles. I set my stop block to 24/16″ which was the value from the spreadsheet rounded up. (Look at the bottom waste section – right field on the 21° line: Column M21) Remember that when you cut a triangle, it will come to a point. If it does not, then your stop block is not set correctly.
Once the stop block was properly set, I made the first cut on one end to create one side of the triangle. Next, I flipped the board over and pushed it up against the stop block and made the second cut. This second cut resulted in my first triangle. Continue this process by flipping the board on each cut until you have the number of triangles that match the number of thunderbirds you are making. Remember, 1 triangle equals 1 thunderbird.
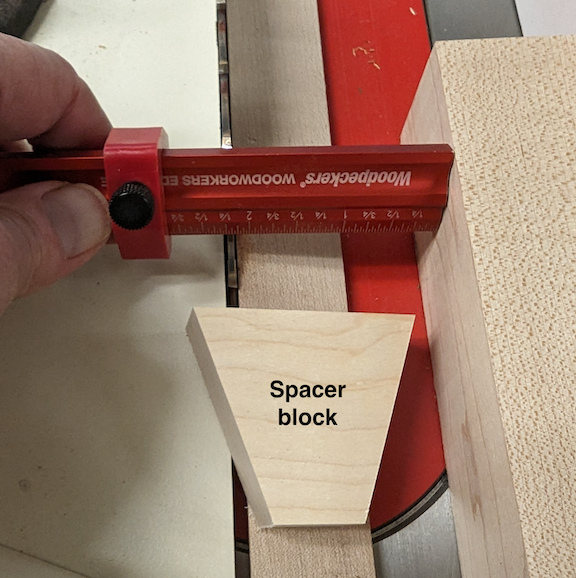
I then cut the maple strip. I used the stop block in its current configuration to make my first cut. The flat edge of the board will remain flat and was pushed up against the stop block and then cut at 21°. The piece that is cut off is the end block of my pattern. I reset the stop block to 2 1/8″ and after flipping the board over, I made my second cut. This creates the spacer blocks that will go between each triangle. (See Figure 5)
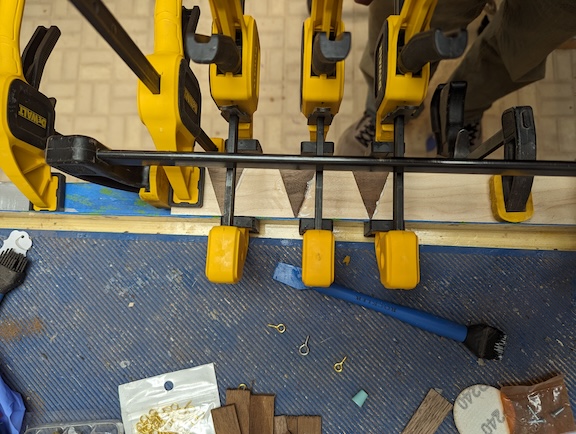
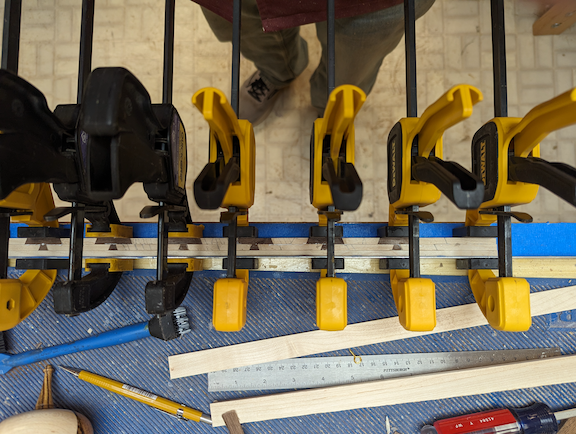
Using a piece of angle iron as a form, I glued the triangles and maple blocks back together, as shown in Figure 6. It takes a lot of clamps to hold everything tight. I applied pressure inward toward the angle iron and also along the long side.
I needed a straight edge before I began the ripping process, so after the glue was dried, I used the jointer to get a straight edge on the side of the wood with the bottom of the triangle.
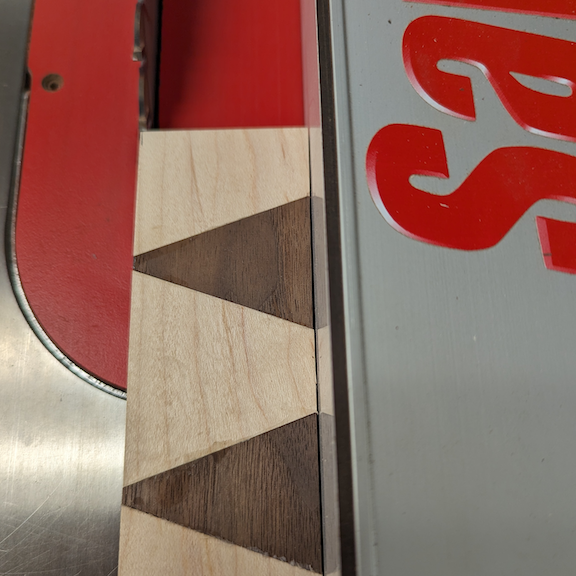
Once the edge was straight, I ripped off 3/16″ from the side of the board with the point of the triangle. According to the spreadsheet, this gave me approximately a 1/8″ flat spot on the triangle. This will be the neck of the thunderbird.

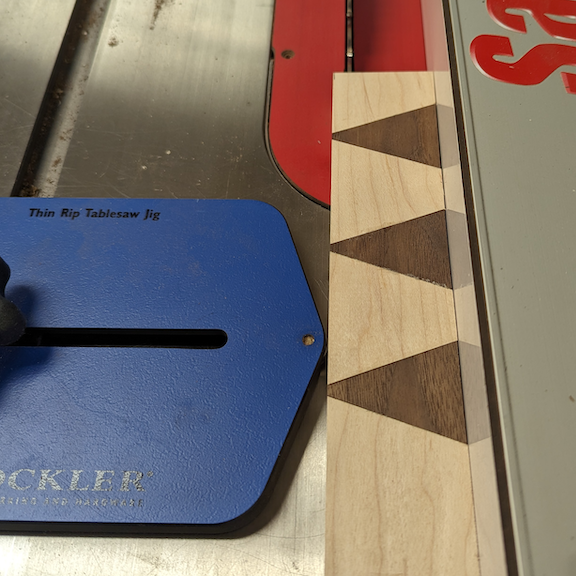
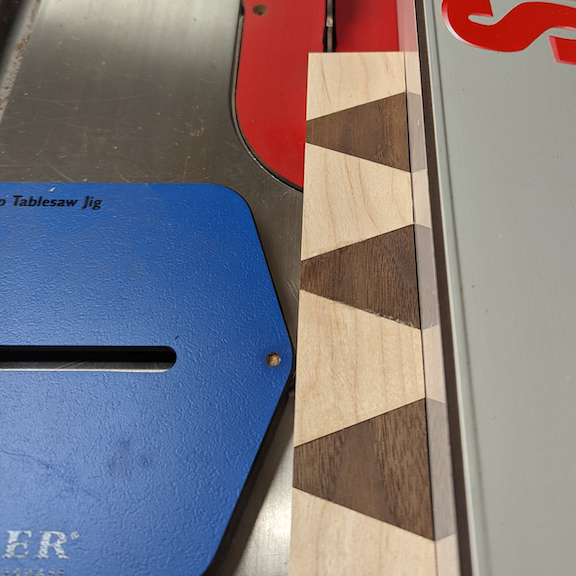
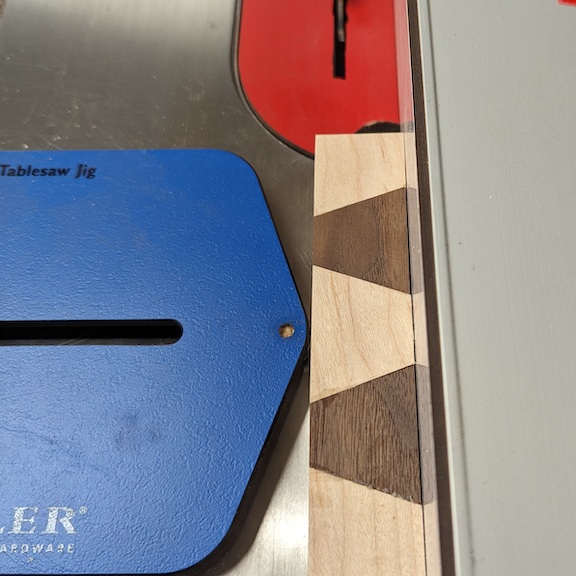
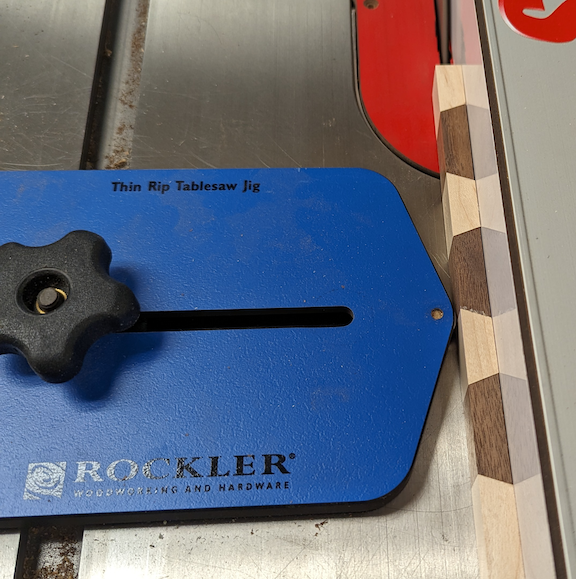
Next, I set up my “Thin Rip Tablesaw Jig” from Rockler to create a 3/16 strip. This was done by placing a 3/16″ iGaging Setup Block between the jig and the left side of the saw blade. I then cut 6 strips.
In Figure 13, I have labeled each of the strips as to how they will be used in the thunderbird. There are two pieces that are waste and will not be used as part of the final pattern. I took these two pieces and laid them aside so they would not confuse me. (Note: This picture does not show the bottom piece. It is the second waste piece.)
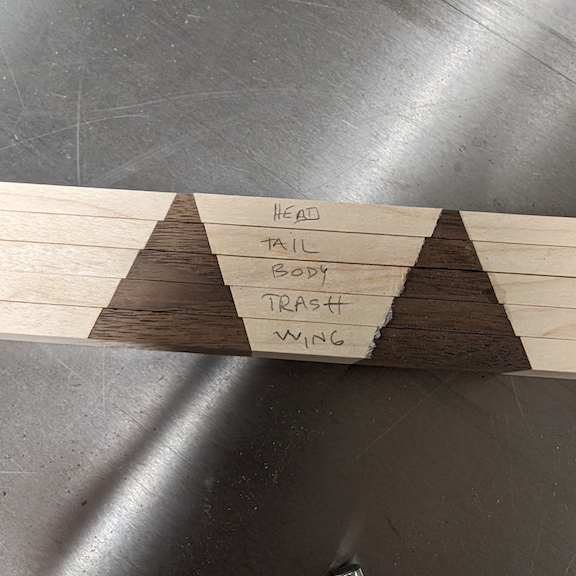
Sometimes when cutting the strips, you find out that you did not get a good glue joint and the strips break apart. Be very careful to keep the pieces in order. If they get mixed up, it will be difficult to salvage the damage.
In the last gluing process, you can put the strips back together. There is a lot of glue involved, so you should end up with a good glued-up strip.
I dry fit the pieces together before gluing. To put them together, take the piece marked “head” and flip it over. Next, flip the strip marked “wing” and place it below the “head”. Next, flip the strip marked “body” and placed it below the “wing” and finally take the strip marked “tail” and placed it under the “body.” Be careful when flipping the pieces that you don’t flip them end over end. If you do, the pattern will not align. I found it helpful to put an arrow on each piece showing the original cut orientation. In the final glue up, I put a strip of maple on top and bottom of the thunderbird.
I glued the strips together one strip at a time. I used lots of clamps, one at each thunderbird to make sure that the glue up of the bird was tight. I glued a strip and waited 3 minutes, then did the next strip. I used Titebond Speed Set glue. Make sure you stay focused so you don’t glue up the strips incorrectly.
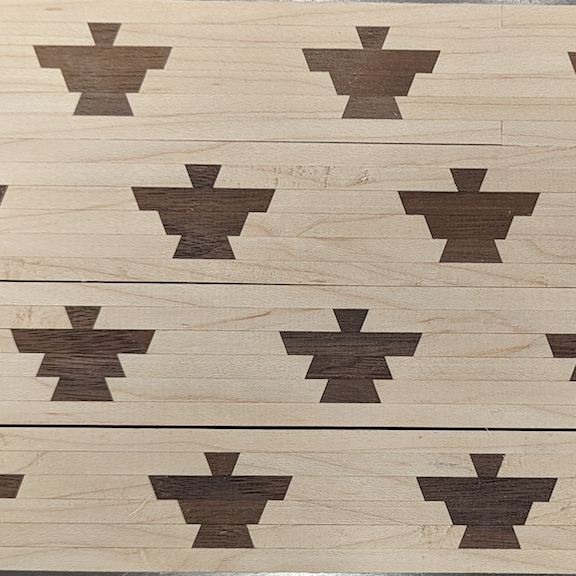
Once you glue all the strips together, you have a strip of thunderbirds. I was making a vessel and needed 18 thunderbirds. Notice in the 3rd row I had lost focus and created a different style thunderbird. Fortunately, I had prepared extra.
Even though it may seem so at first, building the thunderbird is not super difficult. I encourage you to give it a try and use it in your next project!