( You can watch a video is of me using a wedgie sled at “Using a Wedgie Sled.” )
What is a wedgie sled? A wedgie sled is a sled for your table saw that assists in cutting near perfect segments for the construction of segmented rings. It consists of two rails to properly position the wood strips that you are cutting into segments and a way to set precise angles so that the rings close properly when assembled.
A wedgie sled, when used properly, can provide a surefire way of creating perfect segmented rings. When you cut segments, there are many ways to get less-than-perfect results, most of which have to do with your saw blade alignment. For example, the saw blade might not be completely square with the table, or it might not be completely parallel to the miter groove. Because of its dual-rail method of cutting, the wedgie sled negates any error caused when your blade alignment is less than perfect.
My journey into segmented turning began with a homemade wedgie sled. (There are tons of videos on YouTube on how to make your own sled.) Due to some issues I was having with my own homemade sled, I purchased a sled from Pete Marken which was made using a CNC machine. All the Swirl Segmented ornaments described on my site were made using Pete’s sled.
Sled Differences
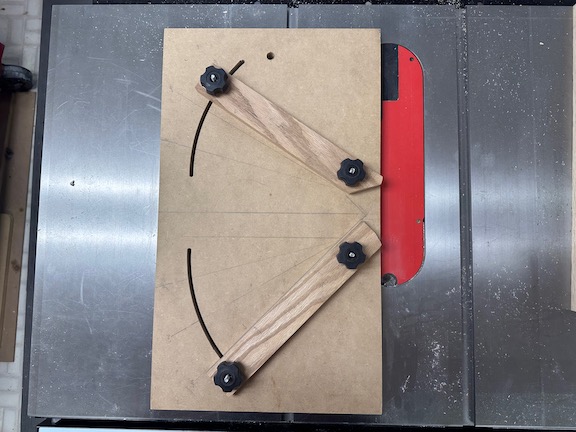
My homemade sled (Figure 1) will let me cut any angle, but there are several downsides to my homemade version. First is the difficulty of setting the angles of the rails properly. I can get them close by using a protractor or triangle and marking them on the surface of the sled, but they aren’t always perfect. Second, getting the rails set properly in relation to the saw blade is difficult. If there is a less-than-perfect alignment there, you still get a set of segments that will combine to form a nice 360-degree ring, but the segments themselves are elongated and have a strange “swirl” built in. Third, and probably most importantly, with flexibility comes complexity. I can use my sled to cut any angle, but the time it takes to set it all up, plus the potential for error if I make a mistake, are both too great for me.
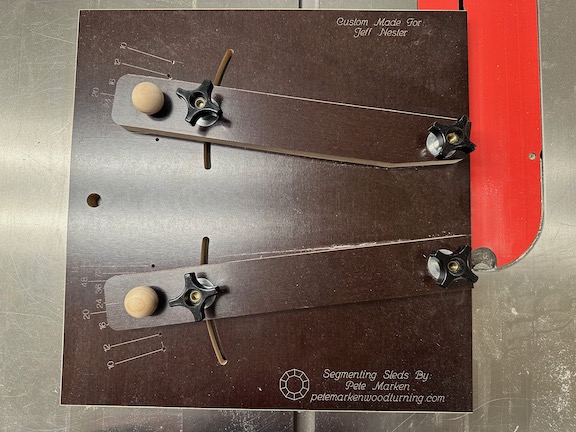
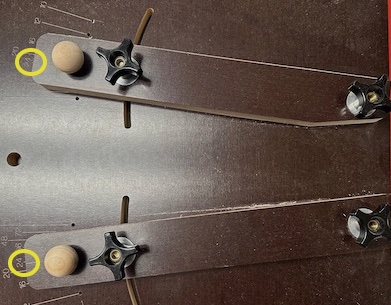
In contrast, Pete’s sled (Figure 2) comes with only 9 pre-set angles. It will cut segments for rings made of 10, 12, 16, 20, 24, 36, 48, 72 or 144 segments. The pre-drilled holes are cut on a CNC machine to ensure perfect accuracy and there is a pin to lock-in your angle choice. As long as you follow the directions you cannot get it wrong.
What Else You Need to Use a Wedgie Sled
Stop Block
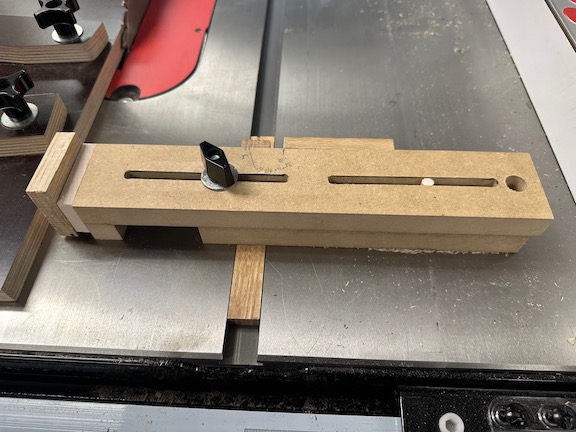
In order to make repetitive cuts of the same size, you will need a stop block. I made my own stop block using the plans I obtained from Jerry Bennett’s SegEasy Website Saw Stop. (Jerry calls his a saw stop.)
Ramp (Zero Clearance Strip)
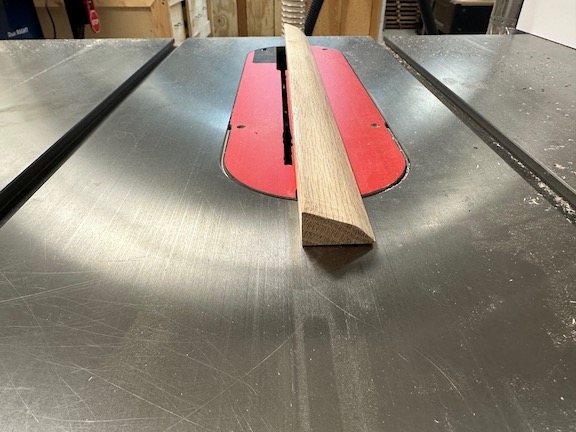
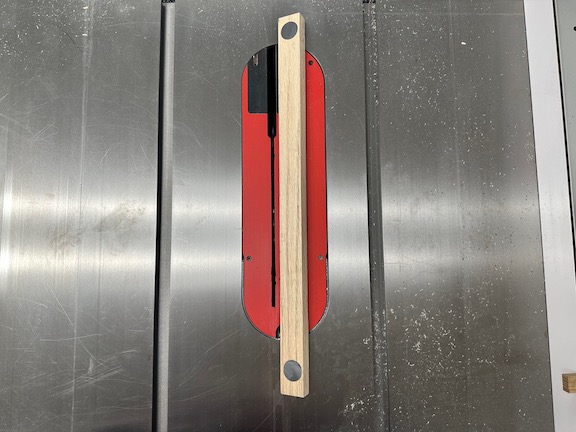
The other thing that I made to help with the process is what I call a ramp. Jerry from SegEasy calls it a “Zero Clearance Strip.” The ramp serves two purposes: 1) It is close to the saw blade to help prevent tear-out when cutting segments (near zero clearance), and 2) It moves segments away from the blade once they are cut.
I made my ramp differently from Jerry’s instructions by using magnets that hold it in place. (Figures 4 and 5)
A Good-Quality Sharp Saw Blade
Based on a recommendation from Jason Swanson (The Pepper mill guy) I use a 10” x 40T Forrest Woodworker II Thin Kerf General Purpose Blade.
Things To Do BEFORE You Start Cutting with the Wedgie Sled
Segmenting work requires precision in order to look its best. Before you ever cut the first segment you need to do a few things:
Determine Segment Dimensions
For a successful segmented piece, you have to determine the exact size of every ring, and therefore, every segment. There are several dimensions that must be determined before proceeding.
- SEL – The length of the outside face of the segment. This length will determine the diameter of the ring that will be made. If you want to check the diameter that will be produced, the equation is Diameter = (SEL * #ofSegments) / π
- Segment Width – How wide the segment will be. This determines the width of the strip of wood that you will need to prepare.
- Segment Thickness – The thickness of the segment, which will determine how thick the completed ring will be.
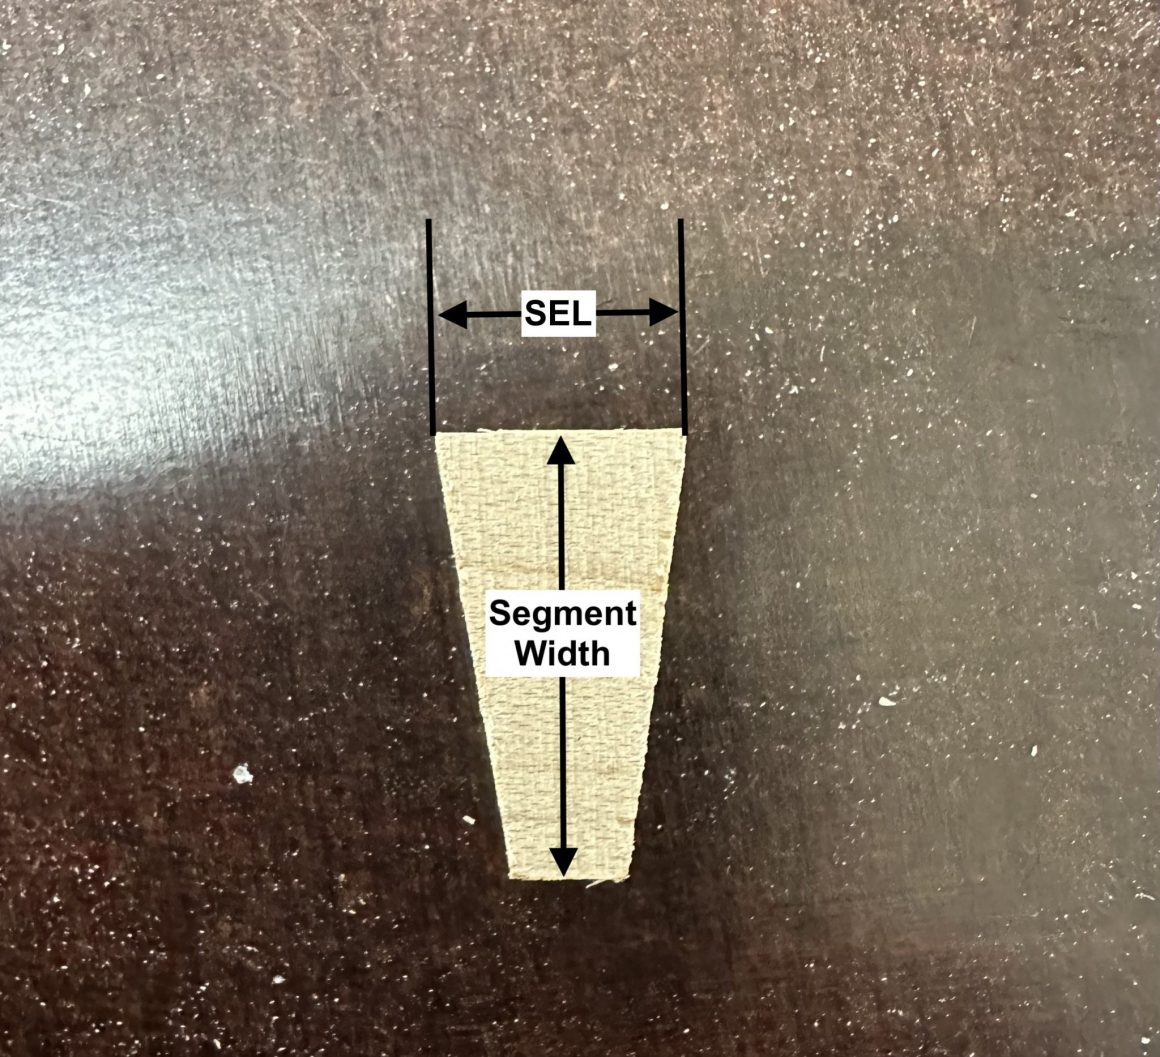
To assist in the calculation of the dimensions described above I have create a spreadsheet. Table 1 below shows an example. In the spreadsheet you need only fill in the yellow columns and it will calculate all of the values. This example only has 7 rings. To have more rings simply copy the last line and replicate it as many time as needed.
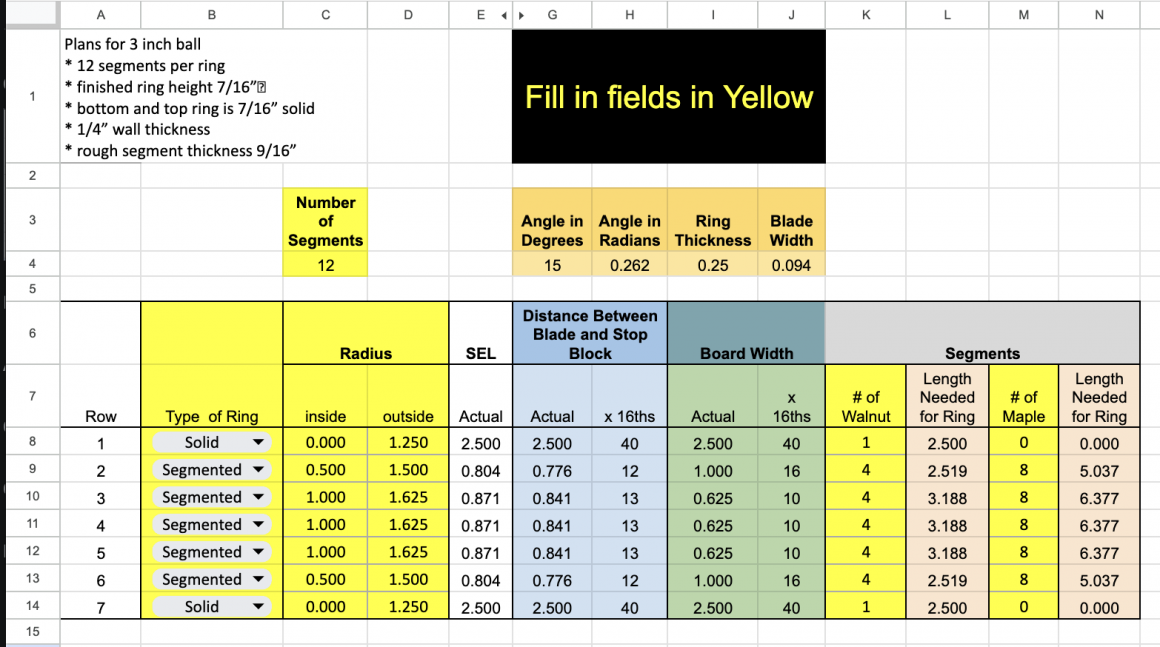
The spreadsheet above is available for download here: 3″ Checkerboard 63 piece excel spreadsheet
Prepare the Wood
You must prepare the stock by milling the wood. I choose to initially mill my wood to a thickness that is 1/8″ thicker than the final Segment Thickness will be. This way, I have plenty of wood to deal with irregularities that occur when I glue the rings up. (I run the glued-up rings through a thickness sander after they are dry to arrive at the final Segment Thickness.)
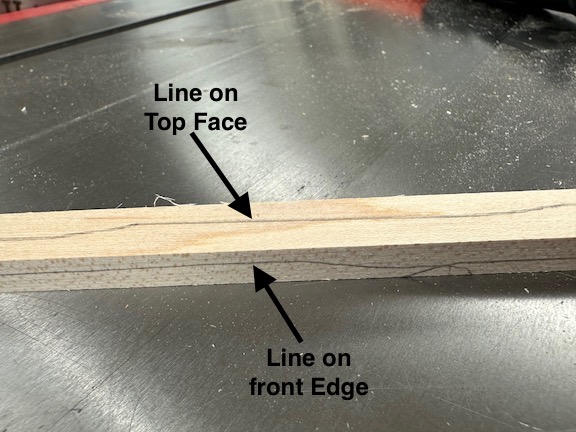
Once the wood strips have been milled to the desired thickness, you need to put two lines on each strip: one on the top face and a second one on the front edge of the board. (See Figure 8) These lines are key to assembling the segments into rings.
How to Use the Sled
Now that you’ve prepared your wood and finished your calculations, you’re ready to get started. To use the tool, set the wedgie sled to your desired number of segments. For this example, we will be cutting segments for a 24-segmented ring which has a Segment Width of 9/16″, a SEL of 3/8″ and a Segment Thickness of 3/16″.
Next, set the stop block to your desired SEL multiplied by the Cosine of the angle the segments were cut, i.e. 180/(number of segments.) In this case the SEL is 3/8″ and the angle is 7.5°. So the distance from the blade to the stop block should be (3/8) * Cosine (7.5°) which is 2.974/8ths. So we will round up to 3/8″. If you are cutting longer segments or the angles are larger the difference between using the SEL or the SEL*Cosine(angle) becomes significant. When you are working with small angles and small SELs you can sometimes use the actual SEL to set the distance without drastically changing the design.
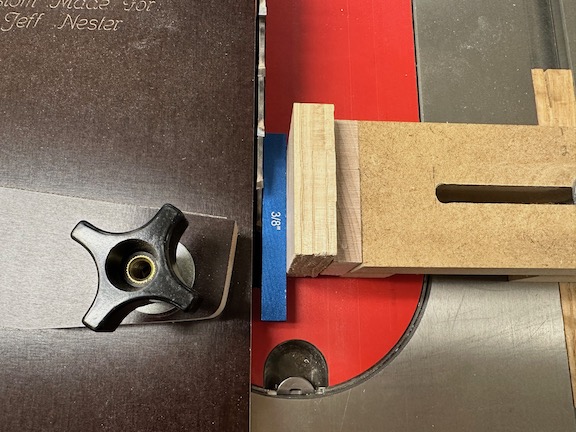
However, do the math to see if it matters or just always do the math. The spreadsheet described above does the math for you. Now that the correct distance is known, I set the distance between the stop block and the blade. I do this by placing the stop block up near the blade and inserting the correct iGaging Setup Block(s) between the blade and the stop block. When tightening the adjustment on the stop block, I make sure not to apply excessive pressure that could bend the blade.
Now remove the iGaging block, and move the stop block down toward the edge closest to you. Place the ramp (zero clearance strip) as close to the blade as you can without touching it. (See Figure 11)
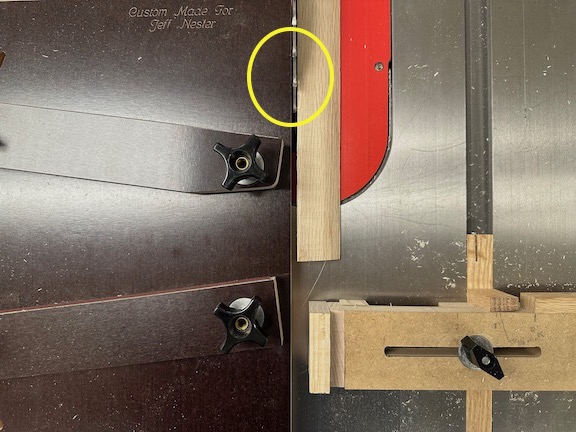
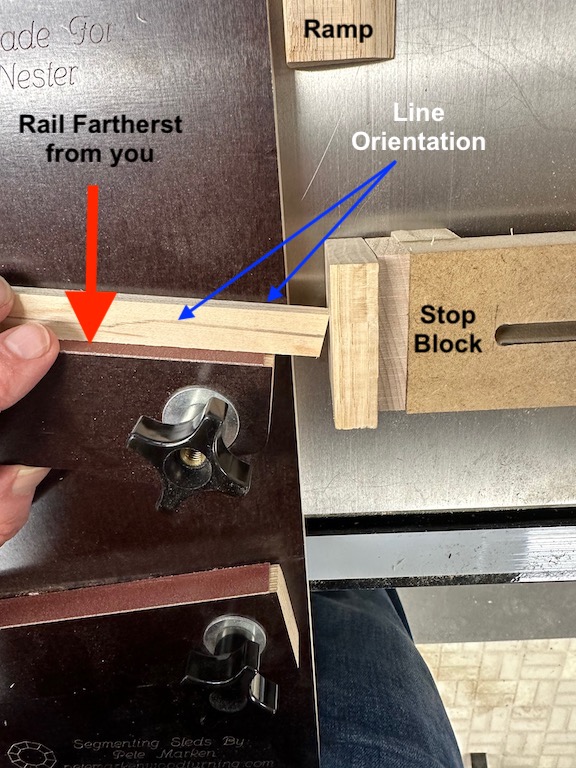
Now you are ready to cut the starting angle on the wood strip. (This first cut is just to get the appropriate angle on the end of the strip). The wedgie sled has two rails. Place the strip of wood against the leading edge of the rail farthest from you, with the line on the top of the wood facing up, and the line on the edge of the wood facing away from you. (Figure 12) Slide the sled forward and cut off just enough wood to get the new angle. (Figure 13)
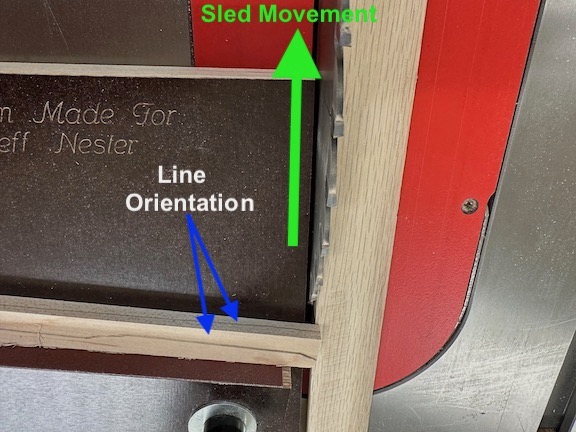
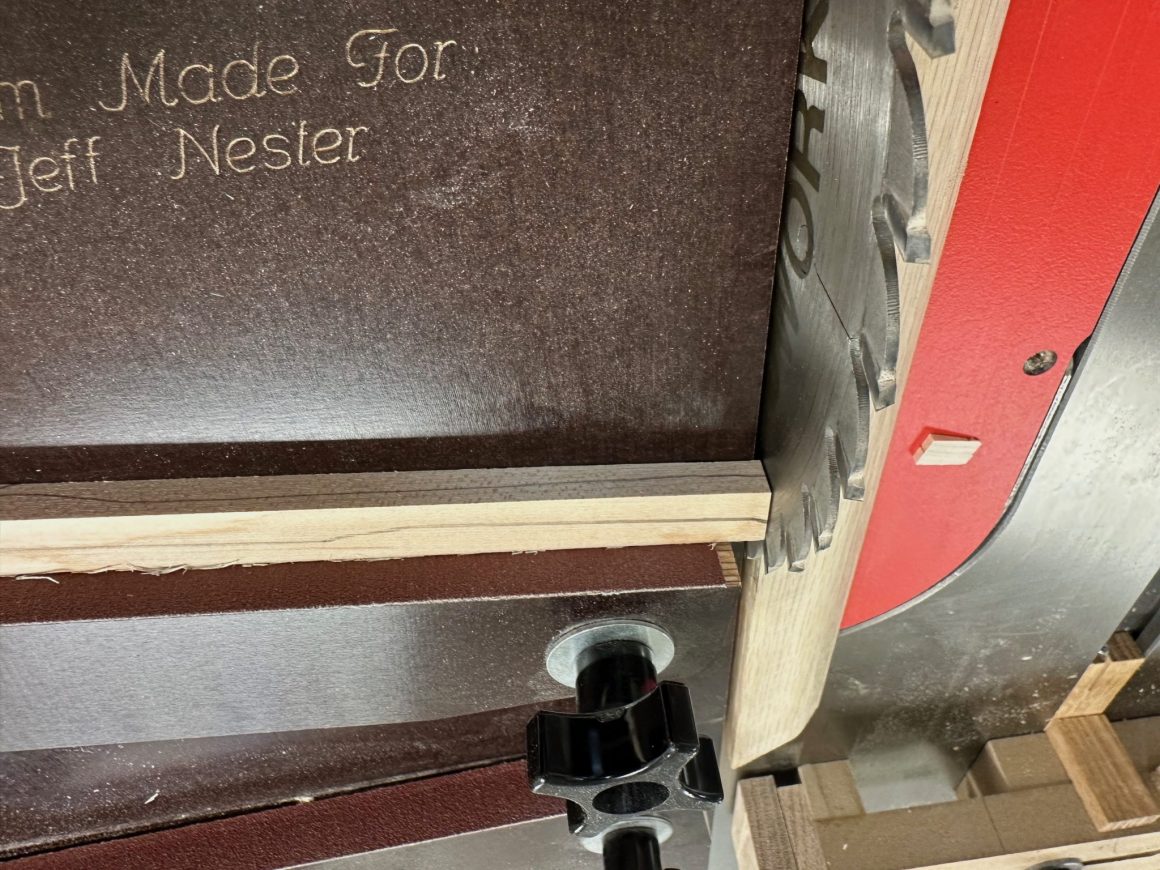
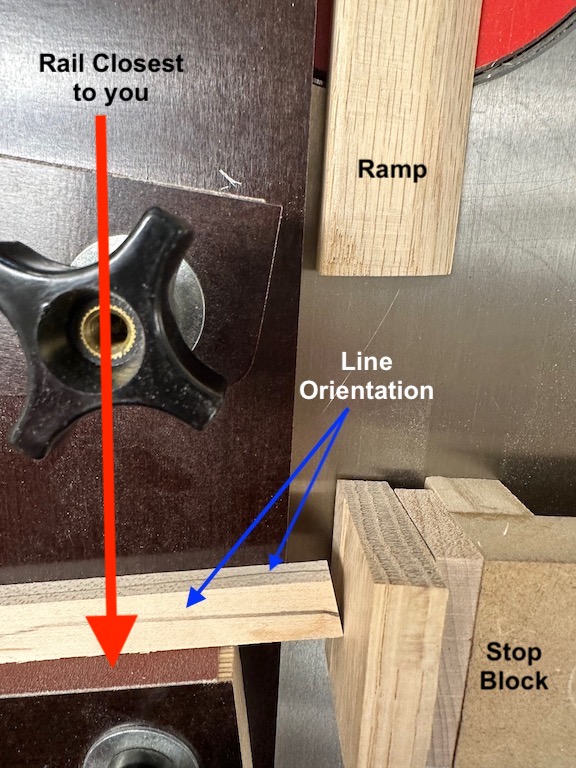
Now, move the strip of wood to the rail closest to you but do NOT flip it over. The lines should be in the same orientation as before. (See blue arrows in Figure 14) Pull the sled back so that the strip of wood is beside the stop block. While keeping the wood strip flush against the rail, slide it to the right till its point is snug against the stop block. Holding the wood strip firmly against the rail, slide the entire sled forward to cut your first “segment.”
Move the strip of wood back to the rail farthest away from you, maintaining the same orientation. You should never flip the wood over. As before, push the point of the wood strip snugly against the stop block, hold it firmly, and slide the sled forward to cut the next segment.
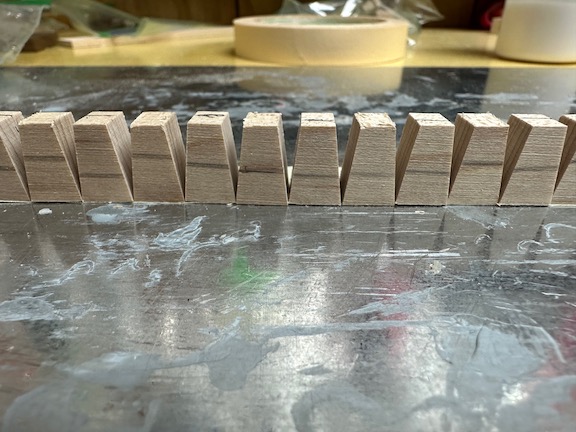
Repeat this process by going from the front rail to the back rail until you have all of the segments you need plus two extra. It never fails that you will have a segment that is not perfect, so having a spare is a good thing. Notice that half the segments have lines on their narrow edge, and the other half have lines on their wide edge. When you assemble the ring, these lines will be important. As long as you orient the lines correctly, the wedgie sled will have removed any inaccuracies that the saw blade could have caused by not being perfectly aligned. Note: If you are working with very small segments it can be hard to see the line on the narrow edge, so you can look at the wider end to determine how to arrange the segments.
Using the wedgie sled techniques in this article will make it easy to create perfect rings.
Have fun cutting!
For instructions on how I glue up my rings see the article: Segmented Gluing Technique
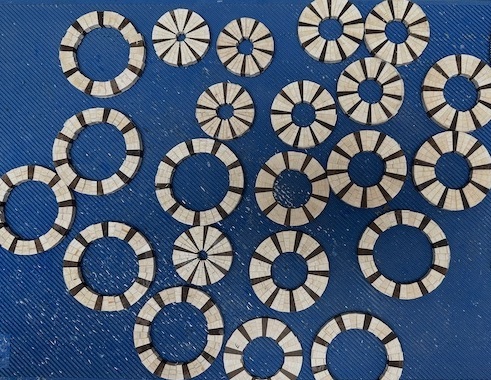
The wedgie sled is one of my most indispensable tools for creating my segmented projects. To see the type of finished product you can make with a wedgie sled, check out these projects on the site:
